r/photoshopbattles • u/PhotoShopBattles • Apr 08 '13
Weekly Battle | Closed Battle #60 "Egyptian Protest" via last weeks winner, DaminDrexil
Please, upvote this submission for maximum visibility (self-post, no karma)
The stock image for Battle #60 is... Egyptian Protest.
This week's image was chosen by the first place winner in last weeks battle, DaminDrexil - who dethroned osrule86 in Battle #59.
Previous original image: Breakfast Stretch
Winning Entry: I wish I had a sister
SIMPLE RULES
Submit your entry as a comment to this thread. The most upvotes wins a trophy flair and chooses the stock image for the next battle.
Every entrant gets a flair. These will be handed out when the battle ends.
You can also edit someone's entry as your own. This can go back and forth. Each submitter is allowed multiple entries.
During the initial 48 hour no-voting period, every entry will be removed and replaced when voting opens.
Please be sure to tag NSFW entries appropriately.
Downvotes DO NOT count.
Vote for as many entries as you like.
Battle will end on Friday April 12th, 2013.
We are using contest mode for this thread which obscures the vote count and the sorting order.
Good luck and have fun!
127
89
108
72
124
38
62
u/AndersonOllie Apr 09 '13
2
u/Zoomalude Apr 28 '13
Looks like something the Maitland's afterlife case worker would have told them to try to scare the Deetz's out of their house.
50
u/cakes1todough1 Apr 10 '13 edited Apr 10 '13
2
50
43
u/illis3 Apr 09 '13
1
1
30
u/designasaur Apr 10 '13 edited Apr 12 '13
6
u/designasaur Apr 12 '13 edited Apr 12 '13
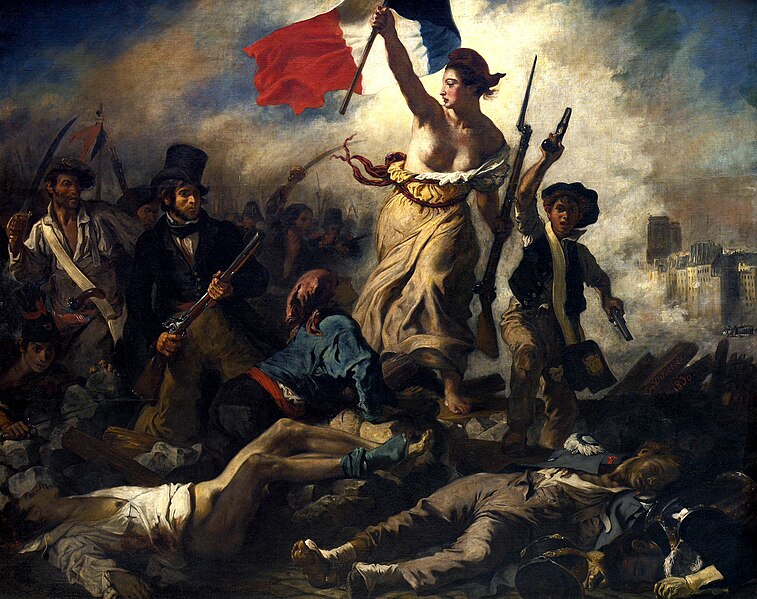
inspired by Delacroix
edit: moved the revision to the parent
22
u/PineappleMeister Apr 09 '13 edited Apr 10 '13
Thunder, Thunder, Thunder...ThunderCats - HO
"fixed" the damn eyes lets play spot the difference!
2
u/Hexorg Apr 10 '13
Sword is lower and has a shorter handle, also redid makeup of eyes and cheeks. Oh and there is some sort of small "ball" missing that was next to his left hand (your right). EDIT: Grammar.
1
u/PineappleMeister Apr 10 '13
hehehe you commented while I was changing the image because I notice the ball so you saw.
27
33
34
u/mobuco Apr 09 '13 edited Apr 10 '13
Inspired by this gif.
0
u/Vesper_Martini Apr 12 '13
This made me laugh so hard I almost choked on my food.
1
19
25
12
17
10
u/Hexorg Apr 09 '13
3
u/Hexorg Apr 10 '13 edited Apr 10 '13
Realities Collide If you have those Anaglyph glasses like this, put them on, look through one eye, then the other. You can see the alternative realities!
9
7
u/mafiamasta Apr 12 '13
http://i.imgur.com/JWMX8Xq.jpg?1
My first entry
-4
u/CAT_WILL_MEOW Apr 12 '13
I can tell
8
u/mafiamasta Apr 12 '13
Haha thank you. Atleast I know someone looked at my entry. I'll try to get better.
12
u/fatdonuthole Apr 13 '13
Wow, that guy was an asshole. I can at least give you some helpful pointers. First off- you did a nice job cutting and placing that guy's face. Keep it up! As for the rest: that guy's face is really desaturated in the original image. Plus the image you placed it on is made of really bright and saturated colors. So I would suggest clipping a saturation adjustment to the layer of his face and boosting the saturation. Afterwards, you might find that his face is not the right color. In that case, add a new blank layer (alt+ctrl+shift+N), set it's blending mode to 'color,' and clip it again to his face. Sample a skin color from vegeta's neck and use your brush tool to paint this color into this layer. If the effect is too intense, mess with the transparency settings of the layer. Another thing: one of the key elements to a good photoshop is that all elements properly interact with each other. For example, you might want to use the burn tool (~15% strength) and shade in the face right around the edges where Goku's fist meets it. This could help it look like they're actually touching. Also, consider where the light is coming from, in this case the upper left. You can use the burn and dodge tools to brighten his face in the upper left and darken it in the lower right to make it look like it's actually in the scene you placed it in.
Sorry for the block of text. I don't know how serious you are about learning but this advice is simple enough and is a good place to start I think. Don't let useless and insulting/troll comments get you down. Also +1 for handling that maturely. But the most important factor in becoming good at photoshop is practice. Posting in /r/photoshopbattles is exactly the place you need to be. Battle on, mafiamasta!
5
u/mafiamasta Apr 13 '13
Thanks alot! I'm just trying things out here and there. I use GIMP, hopefully it isn't a bad software now(I downloaded it years ago). I'm using a lot of simple tools for right now. I need to work on getting colors to meld better. I can tell once I learn how to use the color tools properly I will see better results. Right now I'm using the airbrush tool a lot, I'm only just beginning to actually use GIMP so all of your advice is really helpful. You've definitely convinced me to become a regular on this subreddit.
3
u/fatdonuthole Apr 13 '13
Great to hear! But you say you downloaded GIMP years ago? Photo editing software changes often so I would highly suggest looking at the newest version and some changelogs to see what's been added. It might be worth redownloading/updating.
2
u/mafiamasta Apr 13 '13
I probably should have clarified. I downloaded it years ago, then got a new computer and downloaded it on instinct but never really used it. Mine was at 2.6.0 so I'm downloading 2.8.4 now.
Are there any other beginner's tips you might want to suggest to me?
8
u/fatdonuthole Apr 13 '13
Sure, have another wall of text! However I originally wrote the following for users of photoshop, and I mention specific photoshop terms. I'm sure these have GIMP equivalents, but either you'll have to look them up or find a way to get photoshop's extended trial. Notable: I also wrote this for intermediate level users, and if you find terms you don't understand search them on YouTube. You'll get lost in a sea of knowledge. If you follow along with tutorials make sure you actually follow along on your own and practice the techniques they're teaching, or I guarantee you won't remember it. Anywho here is the text:
Here are some methods I end up using in most of my projects.
Making a cutout
Unless I have an extremely high quality image which was taken specifically for the subject to be selected out, I use the pen tool. I make an outline of the subject, and I usually zoom in ridiculously far to get it close. Being this close can throw you off, you can counter this by squinting (seriously) or zooming out periodically or having an overview of the psd in the side. (It will really help to understand how anti-aliasing works at the pixel magnifaction, you can google this and learn it in like 20 minutes.) Then I make it a selection with a feathering of 0.2 or 0.3 and make a layer mask. If the subject has hair I usually make a 'hair brush' with these settings. I then go into the layer mask with white as my foreground color and brush in the hair. Adjust the angle and reflect when necesarry.
When I have something like this, I use the 'select color range' function or the paint selection tool. If I use the select color range I turn the fuzziness up quite a bit. Then I hit alt+ctrl+r (refine edge) and you probably know how that goes. Then I end up with something like this (added a blue sky to show the mask). A lot of times the branches (or hair) will be partly transparent or showing part of the background. If you go into the layer mask you can use a normal soft brush on overlay mode to fix this. Just use pure white or pure black. It's really cool. Or you could use the burn/dodge tool on the layer mask. Be sure to to have the layer mask selected, or you might accidentally burn the raster image (As you can see I accidentally did that in the example, too lazy to fix, I regret nothing!).
If when you put it on your background and it has grey around the edges don't worry! Give the layer an inner glow, normal blend mode, and sample the color of the hair/branches/whatever for the glow. Now if you're doing this to hair, you probably don't want the inner glow to affect the rest of the subject. So go to Layer>Layer Style>Create Layer. This will put the inner glow on it's own layer, now you can give it a layer mask and mask out the parts of the glow that aren't on hair.
Blending shadows/overlaying text/images with textures.
When blending modes fail you, just double click the layer and mess with the "blend if" options, especially the layer below section. And remember to hold alt/option to split the little arrows in half to allow for feathering. This is a really simple technique but really comes in handy.
Making the scene look real
Lighting and interacting with environment. Where is the light source? What color is the light? What kind of slight tint does the overall color have? Where will my object cast a shadow, how fuzzy/hard is it, how transparent, and what color? I usually clip a solid color layer on color blending mode to change an objects color, adjusting the transparency to fit. Sometimes using the burn/dodge tools works well for light, but sometimes I take the pen tool and draw out the interactions. You can duplicate the object (ctrl+j makes the duplicate layer above, so I hold alt on the layer and drag a duplicate below, it's slightly faster) and make it completely black, this will be the layer for the shadow. Experiment with blending modes, blend if options, and puppet warp if the surface the shadow is being cast on is uneven. It also looks good in some cases to take images of shines and put them on screen mode, as seen here. That image uses all aforementioned techniques, and if you want to explore that psd file you can download it here:http://www.mediafire.com/?8obb0bor3o1754r . I have no idea why that file is 86 MB, sorry bout that.
That was a lot and if you're trying to do something on here and google/youtube isn't solving your problems just pm me, I'll be glad to help.
Remember, the only way to get good is to practice. Good luck!
5
u/mafiamasta Apr 13 '13
THANKS ALOT! I didn't expect this large of a response. During my free time I'll follow your help. Thanks again. You'll most likely hear from me again!
3
7
6
8
6
4
2
1
1
-4
u/mnewman19 Apr 08 '13 edited Sep 24 '23
[Removed] this message was mass deleted/edited with redact.dev
0
-5
u/snuggerrose Apr 08 '13
1
u/CAT_WILL_MEOW Apr 11 '13
no offense but it looks forced
5
u/snuggerrose Apr 11 '13
I know, first Photoshopbattle and I didn't pay much attention to it. It was more about the idea.
-7
-4
97
u/vampipe Apr 08 '13 edited Apr 10 '13
Fantastic Four Entry: http://i.imgur.com/pOAs03L.jpg
Edit: Link